Wednesday, December 19, 2012

Planting at last: Building a NFT / Aeroponics System Part 3

Now that the system is complete and a test run revealed no water leaks (thank God!) I added the appropriate amount of nutrients, adjusted the PH and enlisted my girls to help me do some planting!


Planting is the best part of all of this, because I can finally see my hard work and designs actually getting put into play. 


After the grow stones were added, and the airstones daisy-chained together, it was time to add plants at last!


Everything is running well!


We created a little map of all our plantings just so we can tell them apart.


The lettuce, garlic, strawberries and seedling tray are all hanging on the workbench under another inexpensive fluorescent light bank I pick up secondhand.


I expect to update the status of the plants in the new NFT system very soon.

~Jason

Grommets are Amazing! & Building a NFT (Nutrient Film Technique) Hydroponics System Part 2

Emma and I finally got the NFT system completed and set up.  Using a $5 tote from Lowes and a $20 water pump from Mr. Growitall we prepared to fire up the system for the first time.


We slid the system under the light bank and plugged it in.....the pump kicked on, the sprayers sprayed, the water flowed....and leaked all over the place!  The silicone I used to secure the end caps did not hold. 

The main problem was with my first try at the system, where I used silicone to secure things instead of grommets.  But in my defense, I had no idea about grommets!  GROMMETS ARE YOUR FRIENDS!  A grommet is just an awesome little rubber seal with a hole in the middle to slide stuff through.

Also, I made my drain holes to close to the end of the square unit, so the end cap did not seat properly, so even with the silicone, it still wouldn't seal.


Then, to add insult to injury, I leaned on the $5 tote I was trying to use as a reservoir and cracked it all to pieces.  :( Major bummer.  So, I went back to Lowes and purchased a $14 tough box rated for 500lbs.  Even with my winter weight, I'm not that heavy...


To solve my problems I had to redesign a bit.  I cut the end right off the square tube and started over.  I placed my drain hole a good few inches back from where the end cap would seat and used a rubber grommet and a piece of PVC to complete the drain assembly.


Instead of running the intake line through the bottom, I am shunting the intake line right through the end cap using another grommet.  This will also hold my water line in place within the square tube.


Using a combination of threaded reducers I found at a hardware store, I created a system that will allow me to remove the water tubing from the PVC water line without having to wrench on it, to make cleaning and moving easier.  The key piece of this assembly is a piece with a 3/8ths nipple on one end and a garden hose type female coupler on the other end.


And that's it!  

Now, I'm making small DWC systems (Deep Water Culture or Bubble Buckets) out of the plastic Folgers coffee containers I've been collecting.


Using the Dremel I cut a 3" diameter hole in the top, then smoothed the sides out with the polishing bit.  The Dremel is a worthwhile investment for anyone who doesn't have one.


That's all for this post, but I feel like I'm making some progress at last...

~Jason

Friday, December 14, 2012

Building a NFT (Nutrient Film Technique) Hydroponics System Part 1

Well I've been planting more and more seeds, and since they are sprouting and rooting nicely, it is about time to find them homes outside of the seed starting tray.  I've been chatting with Judd over at Mr Grow It All about fun, effective hydroponics systems that can be constructed without too much specialized equipment.  The design I'm building here is the design idea he came up with for me, with just a couple small revisions to lower the cost a little.  I'm going to be making a few of these (this one in the post is my second attempt) and with each new "model" I'll be making improvements and fixes to issues that I see or foresee arising.


I grabbed two 44" white vinyl post sleeves at Menards.  Next time I'll be buying from Lowes, not only because I feel less dirty there, but because the vinyl posts at Lowes are actually wider, giving us more real estate to work with.  I set my first 3 inch net cup at the far edge of the post and marked it's center.


I went along the length of the post sleeve, marking out center points for all the net cups I would use (5 per post sleeve on this system).  The net cups will end up being 8.5" on center (from center point to center point).


I went up to Lowes and purchased a 3" hole saw.


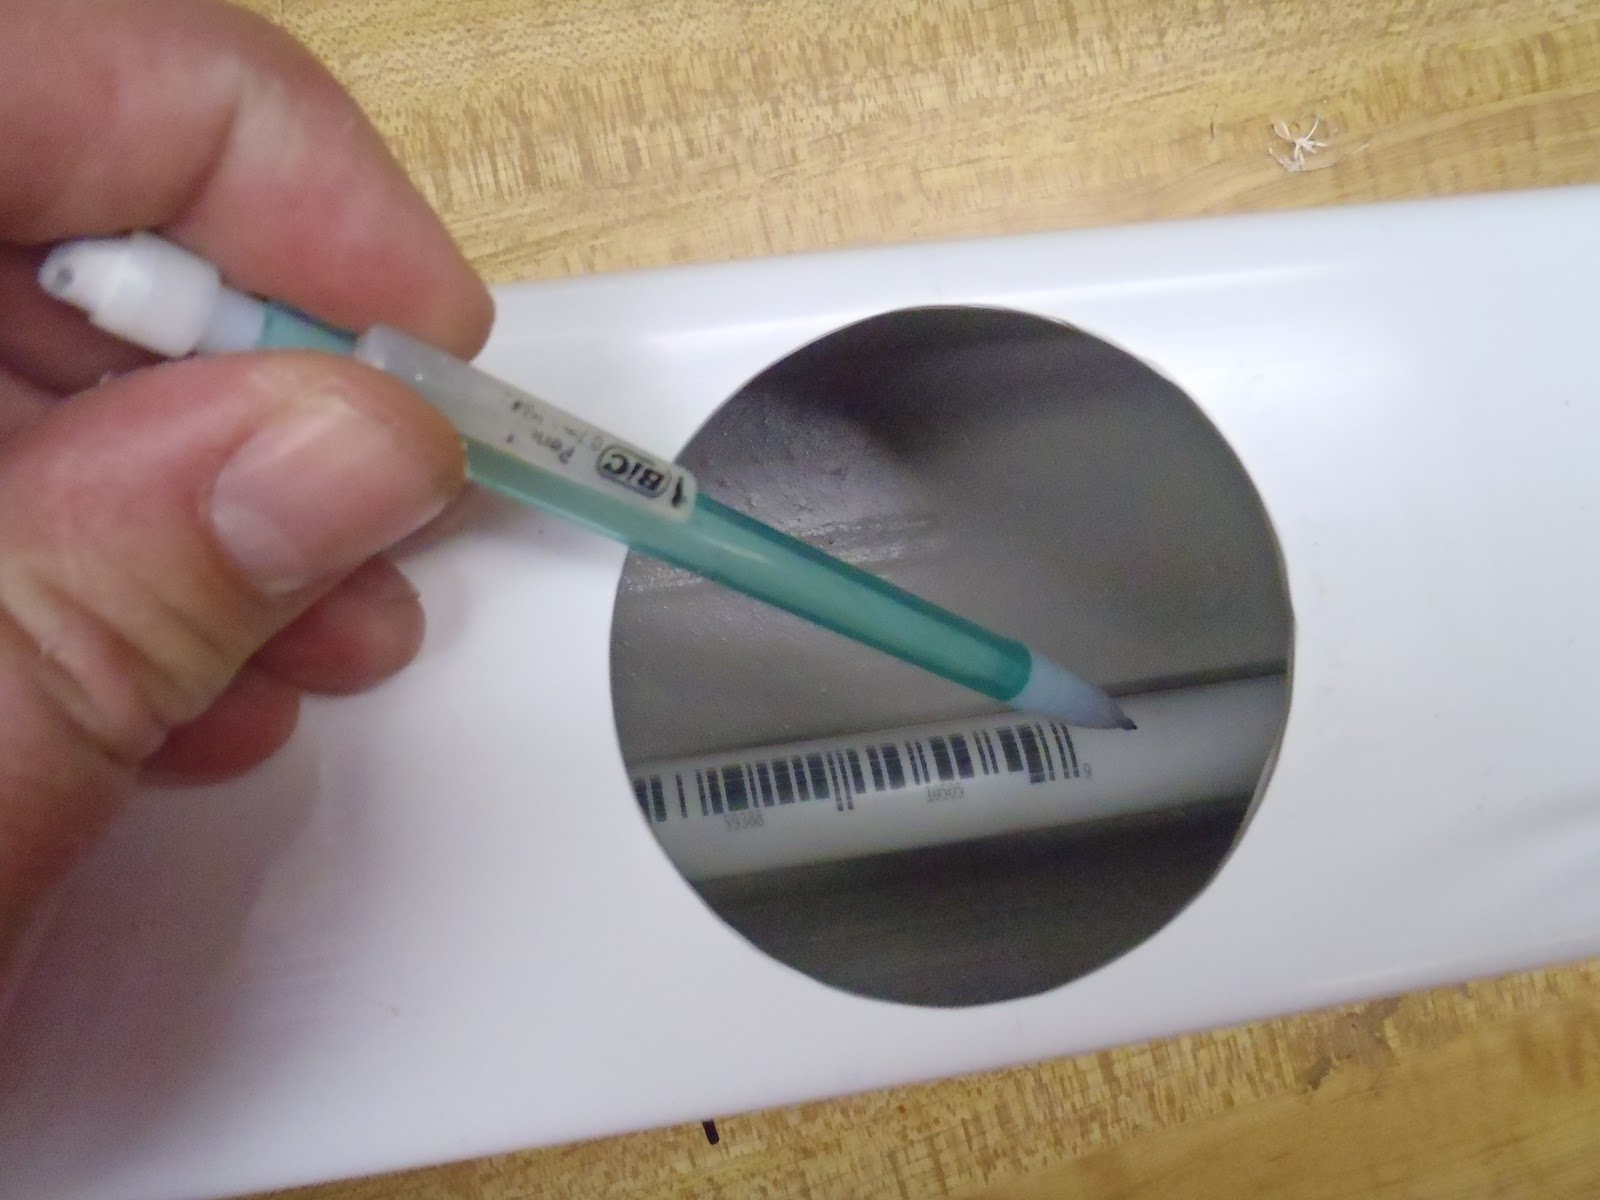
I then went along the post and carefully cut out all of my net cup holes.  The hole saw proved the perfect tool for this job, though special care must be paid to ensuring the drill remains level and plumb otherwise it will bite and bind dangerously.


Once the rough holes were drilled out, they were ready to be refined.


I used Heather's Dremel with a polishing attachment to smooth out the inside of each hole and remove debris.  This was VERY effective.  The Dremel is awesome.


Another trip to Lowes for several half pieces of 1/2" SCH 40 PVC and end caps.


I slid the capped 1/2" PVC into the vinyl post sleeve.


I marked points slightly off from each net cup hole on the 1/2" PVC for the spray nozzles I will be installing.


Then, using an 11/32 (I think) bit, I drilled out five holes along the PVC (the water line).


I set an elbow joint (threaded one end, smooth the other) where I wanted my water intake line to enter the system, and marked that spot on the water line.


The hacksaw will be an invaluable tool for this entire process.


Next, I Dremeled out a hole for the drain out and for the intake using the grommet and o-ring that I will be using to seal these ports up.  (on the first version of this, I didn't use grommets, just lots of silicone....not nearly as good!)


I then installed a drain with rubber o-ring into one of the holes I Dremeled, and then forced the PVC elbow into the rubber grommet through the vinyl post.


Into the PVC elbow, I installed a fitting, I'm not sure what it's called, but one end is a 3/8s nipple and the other side is a 1/2 male thread (to screw into the elbow).


I purchased cheap micro misters from the local hydroponics store (about $.50 a piece) and installed them (pretty much just using brute turning force) into the un-threaded holes in the water line.


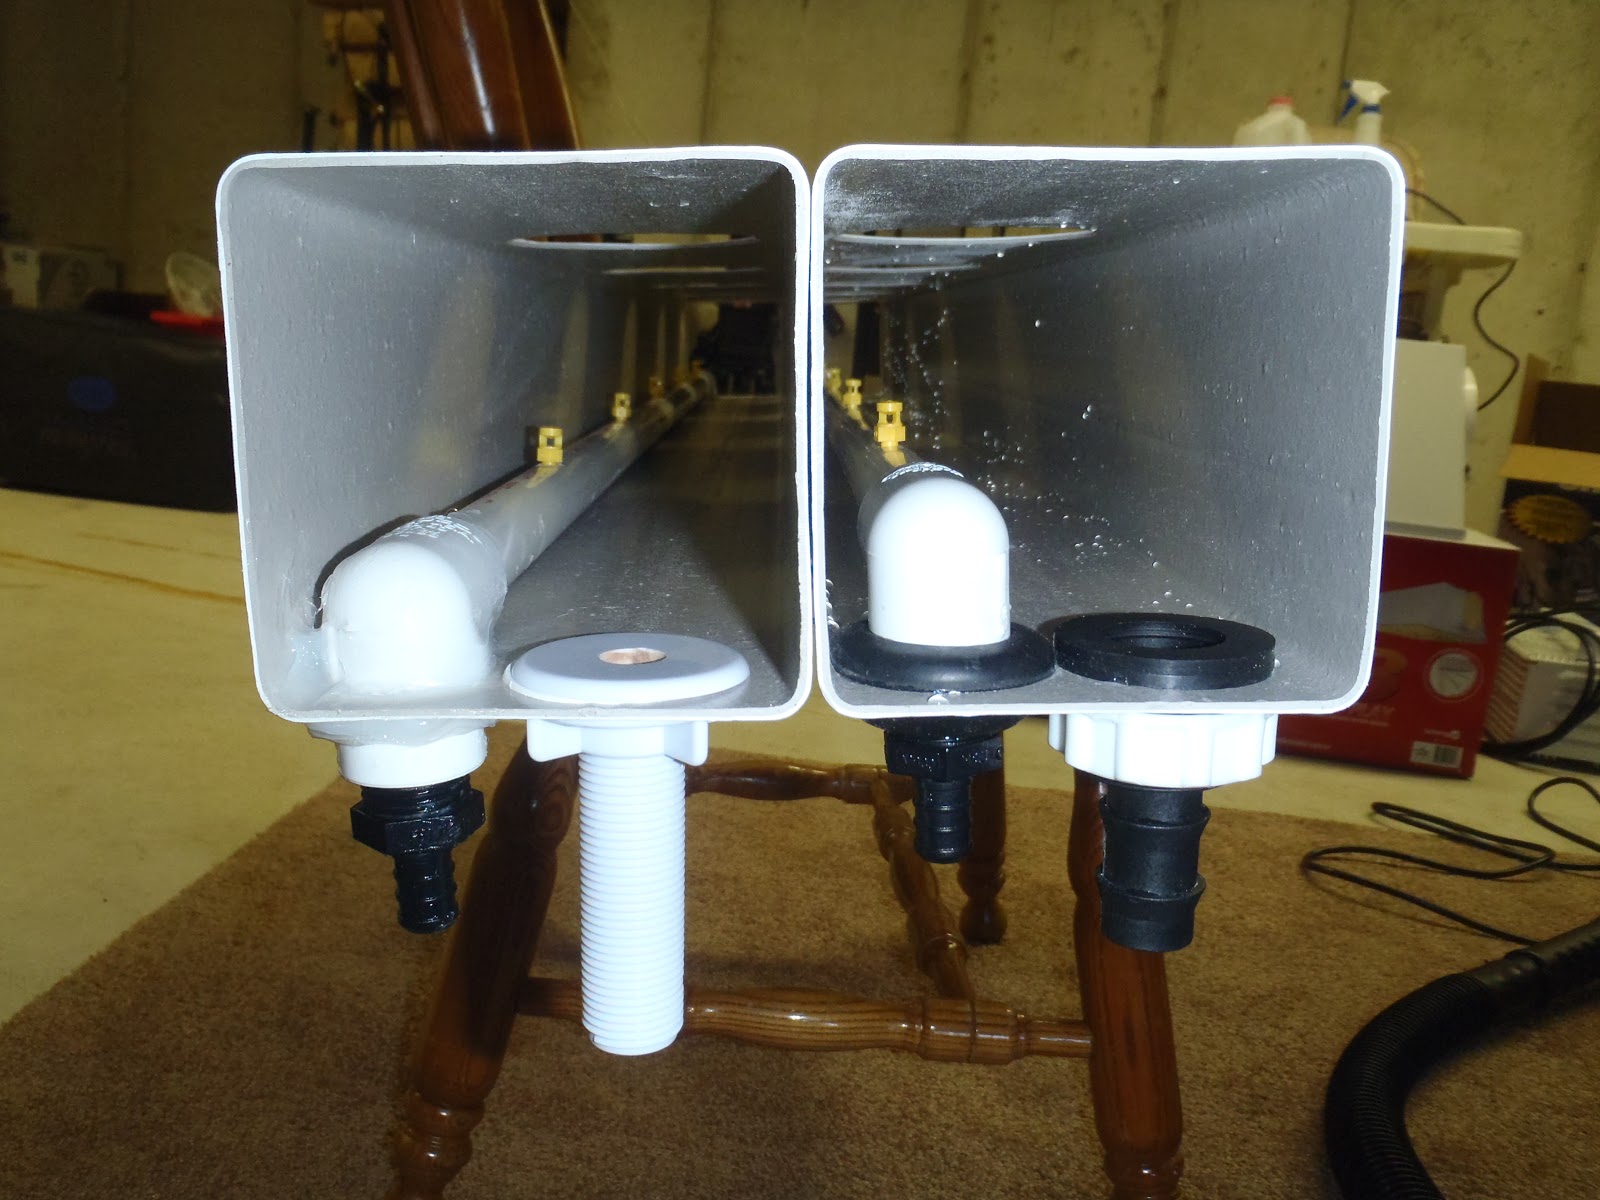
Here is first version, on the left, and second version, on the right.  Subtle differences, but neither has been tested yet...


Emma and I built some support stands out of 1 1/4" PVC and some plastic feet that I purchased.


The idea behind the system is the water that's pumped up from the tote sprays the plant roots with nutrient solution, then runs back down the drain into the reservoir (tote) where it is recirculated.

That's all for this evening, more tomorrow on this system, where I'll test it out.

~Jason

Wednesday, December 12, 2012

More minor updates and CHECK THE PH OFTEN!

This just in, CHECK THE PH DAILY (according to the Mr. Grow) not just once at the beginning, as I  had done.  All of my plants are fine though, but I was reading a PH of about 7.5-8.

The other night (12/8) I added 2 more tsp of nutrient solution to the basil and lettuce DWC tote. So far I have been running half nutrients so the plants could get used to it.  The additional 2 tsp of nutrients should bring the mix to close to full strength.

Tonight (12/13) I took a look at the roots of my plants, checked the PH in the DWC containers and checked on my seedlings.


 The lettuce roots are filling out nicely and are bright white, a sign that they are very healthy, woohoo!


 The lettuce are close to all being mature.  The Simpson Elite (bright yellow in the middle) seems to be thriving better that any of them, although the red leafy stuff is growing pretty full as well.


All of the new seedlings (purchased online in the last month or so) are growing great in the seedling tray with the heating mat under it.  Most of these are ready to transplant, which I hope to do in the next couple of days.


The strawberry plants are still growing well, with new growth continually spiraling up from the crown.

The strawberry roots are starting to really fill out and they are a nice bright white also.  These plants don't seem to be suffering from not having a dormant season.  I'll know more, though, as they continue to grow and hopefully produce some delicious fruit!

~Jason

Thursday, December 6, 2012

Seedling Update: Day 25

The lettuce mix is on day 25 now since sowing, and seems to be doing quite well.  I was hoping for a harvest at 30 days, but I think it may be closer to 40 before the leaves are large enough.


The basil clones are doing OK.  They were great, but then I discovered a couple aphids on them. (There will be an entire post dedicated just to these little monsters) Since I found the aphids, I have been dousing them with a water and neem oil mixture.  The aphids seem to be gone now, but the basil hasn't liked the treatment much either.  The leaves just don't look 100% healthy, but I am hoping that they will be looking good in a week or two.


The strawberry plants I put in the DWC bucket are doing great as well.  The roots are poking out of the bottom of the net cup, and the crown is unfurling, revealing new growth.  I still have quite a few strawberry roots in the refrigerator, and in 2 weeks I'll plant those and see which plants experience the better results, the chilled plants or the ones I put straight into hydroponics.  I'm excited about the strawberries yet to come! 


Now that I have the seedling heating mat, it seems all of the seeds I plant pop up right away.  Without the heating mat my peppers didn't come up at all.  These seedling are still another 2 weeks out from transplanting, but that will give me time to construct something to plant them into.


These seeds were planted just a couple days ago and already they are starting to poke out. 


The Elephant garlic is still rocking in it's shallow soil pot.  I spray is several times a day with a PH-adjusted water mixture.


Here's my little floor set up as it is now.  The entire "garden," now takes up roughly 2' x 4' which is the size of my light bank as well.


Tonight I planted 16 more lettuce rockwool cubes, as I will be expanding my lettuce setup.  We really enjoy salads, and with more production, we'll be able to eat as much as we want.  Plus, the 2 kids of ours that will actually eat salads will enjoy the added production.  Below is my little seed planting set-up before I get started.